Soapmaking with Goat Milk: Benefits and Techniques
Goat milk soap has exploded in popularity, and for good reason! It’s known for its gentle cleansing properties and luxurious feel. This guide will explore the benefits of incorporating goat milk into your soapmaking process and provide you with essential techniques to succeed. Whether you’re a seasoned soapmaker or just starting out, understanding the nuances of working with goat milk is key to crafting beautiful and effective bars.
Why Goat Milk in Soap? The Benefits
So, what makes goat milk so special for soap? It's all about the unique composition of the milk itself. Here's a breakdown of the key advantages:
- Gentle Cleansing: Goat milk's pH is closer to the skin's natural pH than cow's milk, making it less likely to disrupt the skin's acid mantle. This is especially important for those with sensitive skin, and if you've ever experienced a reaction to commercially produced soaps, exploring soapmaking for sensitive skin can be a rewarding journey.
- Moisturizing Properties: Goat milk is rich in alpha-hydroxy acids (AHAs) like lactic acid, which gently exfoliate the skin, removing dead cells and revealing smoother, brighter skin. It also contains triglycerides, which help to nourish and hydrate.
- Rich in Nutrients: Goat milk is packed with vitamins (A, B, C, D, and E) and minerals like selenium, which are beneficial for skin health.
- Soothing for Sensitive Skin: Many people with sensitive skin or conditions like eczema find goat milk soap incredibly soothing.
- Creamy Lather: Goat milk produces a wonderfully creamy and luxurious lather.
The Challenges of Working with Goat Milk Soap
While goat milk soap offers fantastic benefits, it does present some unique challenges for the soapmaker. Understanding these beforehand will help you avoid common pitfalls.
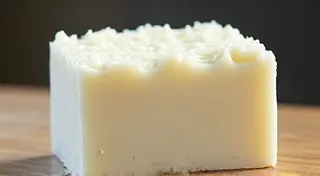
- Discoloration: Goat milk naturally contains pigments that can cause soap to discolor, often turning brown or grey. This is due to oxidation. Adding a bit of Vitamin C powder (ascorbic acid) can help prevent this – about 1/4 to 1/2 teaspoon per cup of milk is usually sufficient. The overall aesthetic of your finished product is important, and some soapmakers strive for a truly natural, rustic appearance which often involves embracing these imperfections – see how others achieve creating rustic soap designs for inspiration.
- Faster Trace: Goat milk accelerates trace, meaning the saponification process happens more quickly than with water-based soap. This requires quicker mixing and pouring.
- Curdled Appearance: Improper handling of the goat milk can cause it to curdle when mixed with lye. This is usually due to overheating.
- 'Brittle' Soap: If not handled correctly, goat milk soap can be more prone to brittleness. Ensuring proper cure time (6-8 weeks) and avoiding excessive mixing are key. Soapmaking can present unexpected challenges, so it's helpful to familiarize yourself with troubleshooting common soapmaking problems.
Preparing the Goat Milk
There are two main approaches to incorporating goat milk into your soap:
- Frozen Goat Milk Method: This is the most common and recommended method. Freeze the goat milk into cubes or blocks. This helps to slow down the reaction with the lye and prevent curdling.
- Heated Goat Milk Method (Less Common): Some soapmakers gently heat the goat milk to around 100-110°F before adding it to the lye. This is a more advanced technique and requires careful temperature control to avoid curdling. This approach requires a deeper understanding of saponification and ingredient interactions.
Lye Calculation & Safety
Always, always, always accurately calculate your lye amount using a reliable soap calculator (e.g., SoapCalc, Bramble Berry). Remember that using goat milk will change the superfat needed, so adjust accordingly. And, most importantly, prioritize safety! Wear gloves and eye protection when handling lye, and work in a well-ventilated area. The complexity of ingredients like goat milk means paying close attention to detail and double-checking all calculations is paramount.
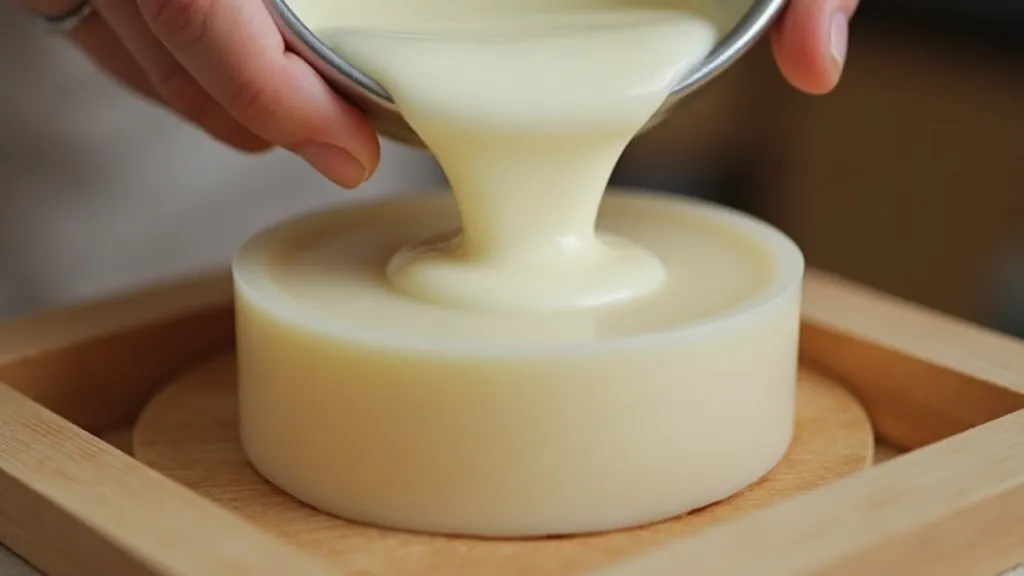
Mixing and Pouring
When adding the frozen goat milk to the lye, do so slowly and stir gently. Watch for signs of curdling. If curdling occurs, don't panic! It’s often manageable. Mix quickly and pour the soap into your mold promptly due to the accelerated trace. A stick blender is particularly helpful for goat milk soapmaking. The speed with which goat milk soap traces can be a challenge.
Cure Time
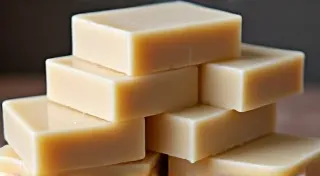
Goat milk soap benefits greatly from a full cure time. Allow the soap to cure for at least 6-8 weeks in a well-ventilated area. This allows excess water to evaporate, resulting in a harder, milder, and longer-lasting bar. This process, where the soap essentially ‘matures’ and becomes more gentle on the skin, highlights the importance of patience in soapmaking. The longer the cure, the better the final product.
Goat Milk Soap Recipe Ideas and Additives
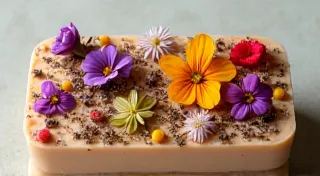
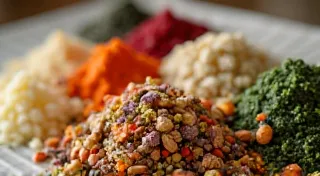
Once you’re comfortable with the basics, experiment with different additives and essential oils! However, remember that some additives can impact the cure time and overall performance of the soap. Careful consideration should be given to each ingredient to ensure a harmonious blend. Consider the effect of botanicals, too. Adding flowers and herbs can greatly enhance the aesthetic appeal and therapeutic benefits of your goat milk soap.
- Honey Goat Milk Soap: Adds extra moisturizing and antibacterial properties. Honey’s humectant properties combined with goat milk’s natural benefits create a truly luxurious bar.
- Lavender Goat Milk Soap: A classic, relaxing combination. The calming scent of lavender pairs beautifully with the gentle cleansing properties of goat milk.
- Oatmeal Goat Milk Soap: Soothing and exfoliating. The combination of oats and goat milk is particularly beneficial for sensitive or irritated skin.
- Citrus Goat Milk Soap: A bright and invigorating scent. Citrus scents can be uplifting and energizing, making them a great choice for a morning shower.
- Rosemary Mint Goat Milk Soap: Encourages circulation and provides a refreshing aroma.
- Chamomile Goat Milk Soap: Gentle on sensitive skin and promotes relaxation.
Conclusion
Goat milk soapmaking requires a bit more attention to detail than traditional soapmaking, but the rewards are well worth the effort! With a little practice and these helpful techniques, you'll be crafting beautiful, luxurious, and skin-loving bars in no time. The art of soapmaking is a journey of experimentation and refinement. Don’t be afraid to try new things, learn from your mistakes, and most importantly, enjoy the process!